copy and modify a virtual machine
I’m trying to find a programmatic way to start and stop hundreds of tiny virtual machines. In order to start up a new virtual machine, there’s a few things that have to be customized.
- the MAC address should be altered - randomized, probably, or maybe sequential if you’re feeling snazzy.
- hostname should be changed to something unique.
- an ssh key should be generated.
- the root password should be changed.
You might be tempted to try and copy the virtual disk, mount it, make the edits, and then start the new VM with all-fresh settings – I was. However, it turns out that the virtual disk is very hard to access.
Instead, we’ll take a different route. I’m going to manually set up the first VM, then snapshot it and create a template from the snapshot. Then each subsequent VM will be created using the snapshot; I’ll then change the MAC address, and after it’s turned on, ssh in and perform the needed changes. Should be a piece of cake.
set up the initial virtual machine
The initial setup of the virtual machine should be done by hand. It’ll be done very rarely, and only when you need to make specific changes – you’ll hopefully make the changes once, ever, and duplicate the VM from then on.
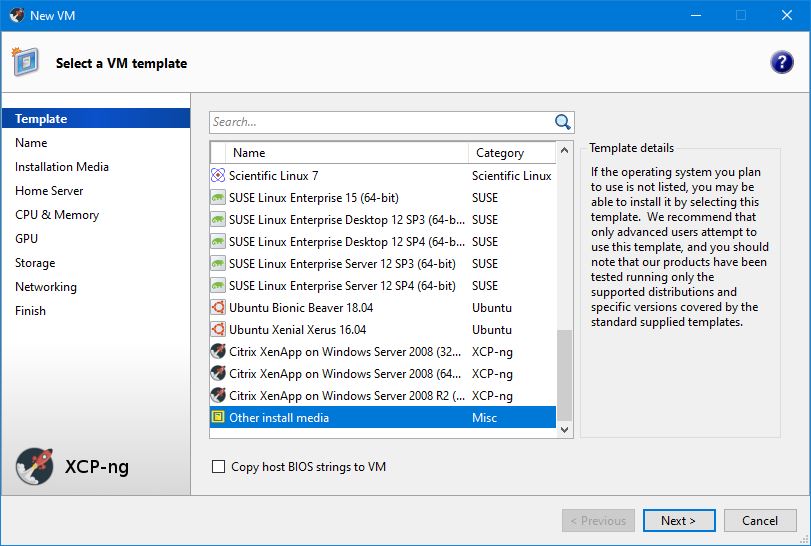
Create a new VM, using the ‘other install media’ template, and install Alpine Linux on it. You’ll have to upload the correct disk to the hypervisor’s ISO storage repository.
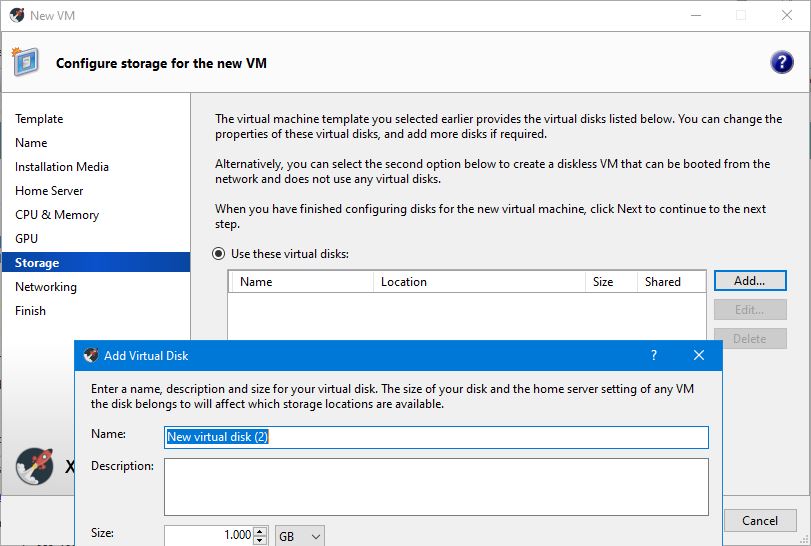
Since it’s a general-purpose template, there’s no default disk included. You’ll have to add one. I’m going with 1GB.
Start it & install Alpine.
Once Alpine is installed, set up passwordless ssh.
At this point, the VM can be accessed remotely, and is a fairly clean slate. It’s ready for on-demand duplication.
making copies
Now we go through the steps that should be scripted, and run sequentially every time you need a copy of the VM.
Identify the UUID of the virtual machine you created:
xe vm-list
It may be useful to store that UUID in a file for easy access, since it’ll be needed every time a new VM is spun up.
e.g.:
echo "long-uuid-string" > vm-template.uuid
And pull it into a variable again when needed:
vm_template_uuid=`cat vm-template.uuid`
Now we can create a new copy of the VM. There’s two potential commands available: vm-copy and vm-clone. We want the former: it will copy an existing VM, but without using storage-level fast disk clone operation (even if this is available). The disk images of the copied VM are guaranteed to be ‘full images’ - i.e. not part of a CoW chain.
xe vm-copy new-name-label=<new name for the new VM> vm=<name or UUID of the copied VM>
Remember to save the output, which is the UUID of the new virtual machine. That UUID is how you’ll identify the VM later, when you want to customize it.
customizing the duplicated VM
There’s two ways to modify the OS of duplicated VM: mount the disk and cd inside, or start the VM and ssh inside.
mount the disk and cd in
It looks like the virtual disks on a xen server are some weird hybrid of files and mounted devices. The upshot is, there’s no actual file path that points to an actual file that can be copied somewhere else (I imagine there’s some performance enhancements involved). I.e., if you pull the drive from a xen server installation and mount it on another OS, there’s no virtual disk file to be found. I don’t understand it either, but that seems to be the state of affairs. Who knows where the data actually is.
In order to manipulate a virtual disk, an ‘actual’ file has to be created. This can be done by directly exporting it, which is relatively easy.
xe vm-export vm=<name-of-vm-get-it-from-the-console> filename=<output_file.xva>
However, pulling data off your fresh new disk file is another story altogether. The XVA disk image format is custom, and uses a format one coder has called a “strangely crafted tar-file”. Not only that, an XVA disk image file is basically a complete physical disk, which means it has partition tables and multiple partitions inside – it’s not like extracting a zip file.
There is a tool I found, written in C++, that could do the trick. As of November 2020, it’s only compatible with xcp-ng 8.0, not 8.1 or above. Something about a new hash scheme (it looks like the new one is a speed improvement) that hasn’t been implemented. If this avenue is sufficiently important, I might have to figure out enough C++ to make a patch.
The other downside of the ‘mount & cd’ modification method is that these conversions take a while, and even after all the above rigmarole the virtual disk will still have to be wrapped back up and imported back into the hypervisor. If this is happening frequently and on a tight schedule, it’s not the way to go.
start the VM and ssh in
As a result: to edit the contents of the VM with a script, judicious use of ssh and scp will be far more efficient. The former can execute arbitrary commands inside the VM (remember how you put a root ssh key in the template VM?), and the latter can upload config files, scripts and tarballs into the VM. That’s how we’re going to do the customization.
First, we need the IP address of the VM. This is probably the most fragile component in the whole process: it’s dependent entirely on an external DHCP server, and the only really reliable solution is a full network scan.
get the IP address the easy way
However, if:
- the original template VM is kept turned off, and
- the MAC address is not changed (and is left as the final alteration to the VM after all internal changes are finalized), and
- the DHCP server has a sufficiently long IP address reservation timeout, and
- we only spin up one new VM at a time,
then we can jot down the IP address of the initial template VM and it will be the same as the IP address for the new VM. So go back to the template VM, start it up in xcp-ng center, open the console, get the ip address and shut it down again.
ip address
get the IP address the long way
Just for completeness, and because I’ll probably need this method in the end anyway, here’s how to search the local network for the IP address.
First, get the MAC address. This is hardware-defined, so we can ask xen for it; but you’ll need the UUID of the VM. You saved it, right? (See above, when you made the copy.)
xe vm-vif-list vm=<UUID of the VM> | grep -Po 'MAC \( RO\): \K.*$'
If there’s multiple MAC addresses associated with the VM, you’ll get more than one in the output. Once we have the MAC, we can search the local network for the IP address associated with that MAC address. Note that your local network IP range might be different from the one here; however, the example below uses the most common range. If it’s different, you’ll probably know what should go instead.
nmap -sP 192.168.1.0/24 >/dev/null && arp -an | grep <mac address> | awk '{print $2}' | sed 's/[()]//g'
If that doesn’t work, remember to check that you’re using the right IP address range.
modify the VM
I don’t yet have anything specific in mind; so I’m just going to provide two examples of what can be done.
Upload a file into the VM:
scp /local/path/to/file.txt root@<IP address>:/place/to/put/file/on/VM/
Execute a command or run a script inside the VM. You can do as much as you can fit on a single line; but try to implement some error checking in case something fails.
ssh root@<IP address> "set.sh;of.sh;commands.sh;to.sh;run.sh"
Now you’ve successfully modified a VM inside a xen hypervisor, all using commands that can be easily scripted.
Done!