FPGA "Hello World"
Found a cheap FPGA on ebay - 10 bucks. Can’t say if it’s any good yet, but it’s enough to teach me more.
The collection of tools I had to put together to get code onto it is somewhat daunting, and I keep forgetting how to do it all.
There’s two parts to process of programming an FPGA. First part, compile your code into a ‘bitstream’ - the FPGA equivalent of a binary, I guess. Second part, upload the bistream to the FPGA. Each part is made harder by the proprietary nature of most of the tools involved. (Otherwise, the whole thing could be wrapped up into one or two scripted, automatically-run commands, and I could run it from my linux laptop.)
You’ll need Quartus II, version 13.

part one
Open it.
![]()
I still have the project files from last time, so I’ll just go over the various settings.
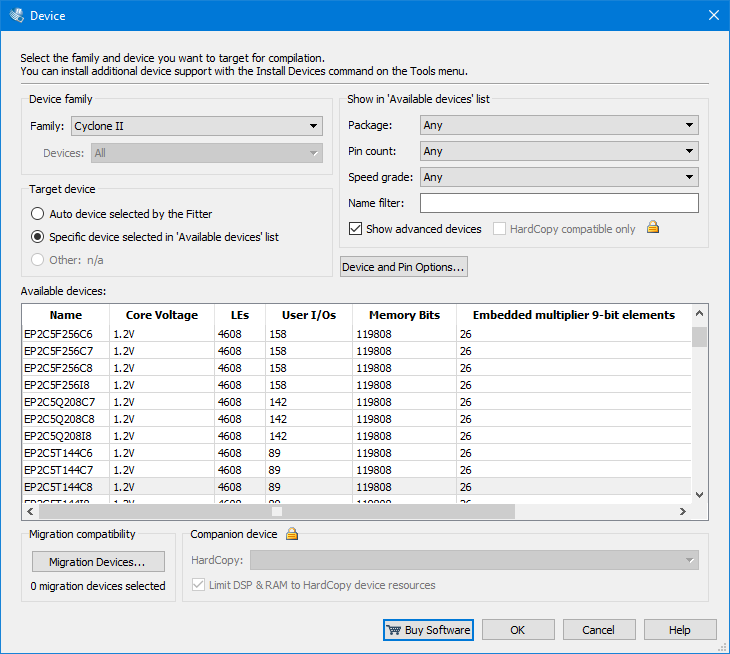
Choose the device: the specific FPGA chip on whatever dev board you have. Note that the chip I’m using is highlighted below: EP2C5T144C8.
Create a new file, with the extension .v to hold the test code. It doesn’t do more than just make an led light up - but that’s enough to confirm that the code compilation and upload worked.
Put the following code in that file, and save it somewhere. I don’t remember where I found this scrap, but I definitely didn’t write it myself. I don’t even know if it works the way it should - but it compiles, and it gets pushed to the FPGA, and the light blinks, so it does its job.
module counter (clk, reset, enable, count);

// (t9) turns on the LEDs, no oscillation

input clk, reset, enable;
output [3:0] count;
reg [3:0] count;

always @ (posedge clk)
if (reset == 1'b1) begin
  count <= 0;
end else if ( enable == 1'b1) begin
  count <= count + 1'b1;
end

endmodule
Hit compile. If it works, awesome. If it doesn’t, I clearly forgot something and you’ll have to figure out what it was.
part two
You’ll need a chip programmer. I found one on ebay for a few bucks. Hook the dev board to the programmer and the programmer to the computer.
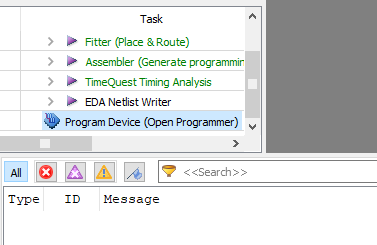
Open the programmer. Right click on the selected option below and choose ‘open’.
Below is the window you get when the programmer opens. I’ve already filled in the information, so you’ll have to just make your programmer match mine.
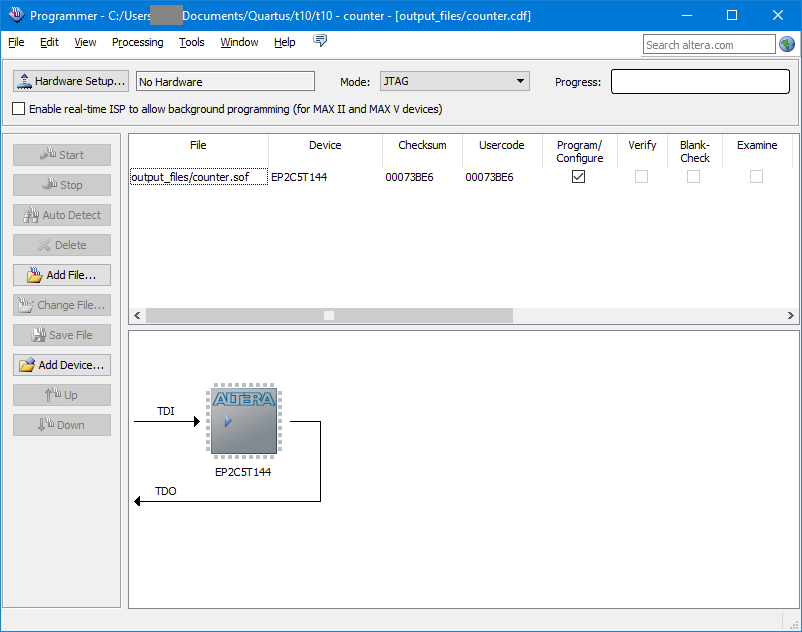
When done, hit Start in the upper left corner of the programmer window. If all went well, the FPGA board should follow the programming you gave it.
Done.